
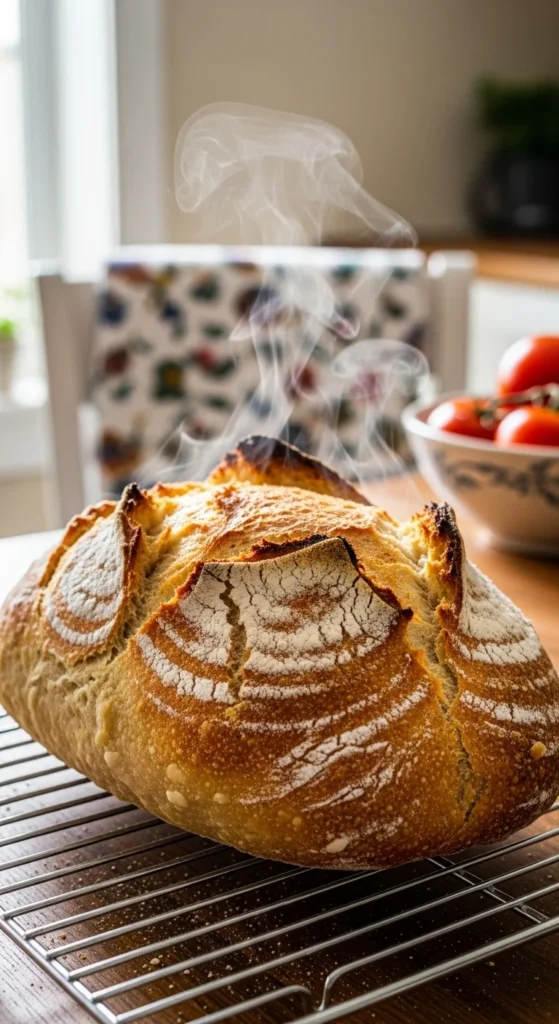
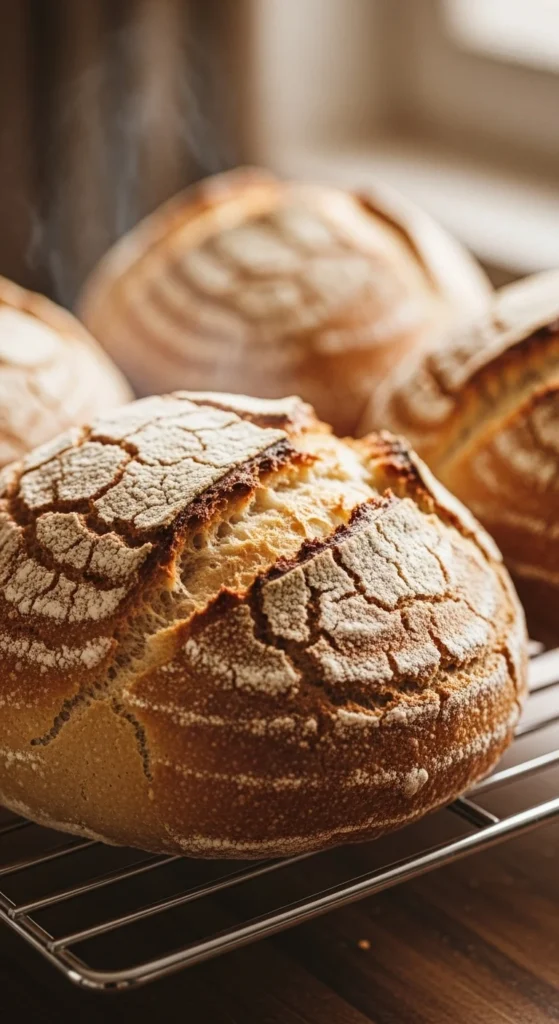
A perfect bread crust is crisp outside, golden brown, and lightly crackly when you tap it. Inside, the bread stays soft and airy. That balance comes from three things working together: good dough, high heat, and steam.
You do not need fancy ingredients or professional ovens. You just need to understand what each step does and follow it with care.
Start With Simple, Strong Ingredients
Good bread crust starts with good dough. Most homemade easy bread recipes rely on just four basics:
- Flour
- Water
- Yeast
- Salt
Bread flour gives the best results because higher protein helps structure and chew. If you only have all-purpose flour, your bread will still work, but the crust will be slightly lighter.
Salt is not just for flavor. It strengthens dough and helps with browning, so do not skip or reduce it too much.
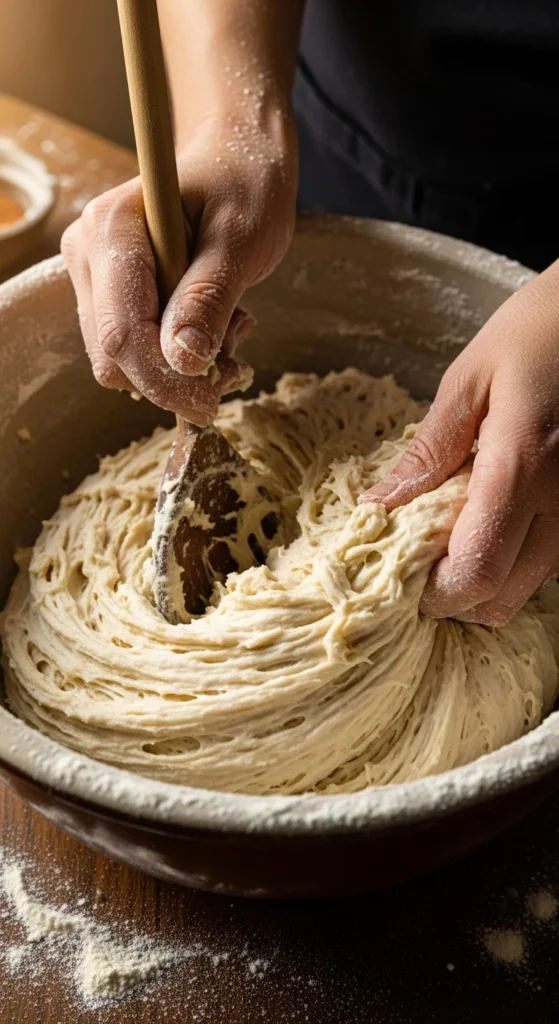
Mix Into A Soft Dough, Not A Dry One
Many people add extra flour too fast. That makes dough stiff and leads to dense bread with a thick crust. When mixing your simple homemade bread:
- Combine until no dry flour remains
- Expect a rough, shaggy look at first
- Dough should feel soft and slightly sticky
Let the dough rest for 10–15 minutes after mixing. This allows flour to absorb water and makes handling easier without extra flour.
Let The Dough Rise Fully
Fermentation builds flavor and structure, which directly affects crust quality. For your perfect bread recipe:
- Let dough double in size
- This usually takes 1–2 hours at room temp
- A warm spot helps but avoid hot areas
For better flavor and blistered crust, refrigerate the dough overnight. Cold fermentation is common in baking homemade bread because it improves both taste and crust texture.
Shape With Gentle Tension
Shaping is where many loaves go wrong. Loose dough spreads instead of rising. So, when shaping:
- Lightly stretch the surface
- Tuck edges underneath
- Aim for a smooth, tight top
This creates surface tension, which helps oven spring and gives your loaf a rounded bakery look.
Preheat The Oven Properly
Your oven must be fully hot before bread goes in. This step is critical for the crust.
Preheat to 450–500°F and allow:
- 30–45 minutes for the oven
- Time for a baking stone or Dutch oven to heat through
Strong heat jumpstarts crust formation and oven spring.
Add Steam At The Beginning
Steam is the biggest difference between home bread and bakery bread. Moist air keeps the crust flexible early on so the bread can expand.
Easy home methods:
- Place a tray of hot water in the oven
- Drop ice cubes into a heated pan
- Bake in a covered Dutch oven
After about 20 minutes, remove the steam source or lid so the crust can turn crisp and golden.
Score The Dough Before Baking
Scoring controls how bread expands. Without it, your loaf may crack randomly. Use a sharp knife or blade and:
- Cut about half an inch deep
- Hold the blade at a slight angle
- Make one confident slash
This guides expansion and improves appearance.
Bake Until Deep Golden Brown
Do not pull bread out too early. Pale bread usually means soft crust.
Most loaves bake 35–45 minutes. Signs it is ready:
- Deep golden brown color
- Hollow sound when tapped underneath
- Firm outer crust
Color equals flavor when baking homemade bread.
Cool Before Cutting
It is tempting to slice immediately, but hot bread is still setting inside. Cool on a rack for at least 30–45 minutes. This keeps the crust crisp instead of softening from trapped steam.
Common Problems And Fixes
If your bread is not turning out like the best white bread recipe, small adjustments usually solve it.
Pale crust
Often from low heat or no steam. Increase oven temperature and use steam early.
Flat loaf
Usually from over-proofing or weak shaping. Shape tighter and shorten rise time slightly.
Very thick crust
Can come from baking too long or skipping steam. Use steam first, then bake uncovered.
Dense interior
Often from too much flour. Keep dough soft and slightly sticky when mixing.
These tips help whether you are learning how to make easy bread or improving a simple white bread recipe.
Final Thoughts
A great crust comes from understanding heat, moisture, and timing. Once you practice a few times, you start recognizing how the dough should feel and how the crust should look.
Making your own bread gets easier with every loaf. Pay attention, adjust slowly, and your results will keep improving.
Save this guide and try it on your next bake.

Leave a Reply