
Brown butter is one of the simplest ways to add rich, nutty depth to both sweet and savory dishes. It takes just a few minutes, but timing and attention matter. This guide walks through the process clearly, so you know what to look for, what to listen for, and when to stop.
Start With The Right Setup
Before heat comes into play, the tools you choose make a noticeable difference.
Choose The Right Pan
A light-colored pan is essential because butter changes color quickly toward the end.
Why this matters:
- Dark pans hide browning and lead to accidental burning
- You need to see the milk solids clearly as they toast
Best options:
- Stainless steel saucepan
- Light enamel-coated pan
Avoid nonstick or dark cast iron for this process.
Use Unsalted Butter
Unsalted butter gives you more control and behaves more predictably.
Benefits:
- Less splattering during foaming
- Easier to season later
- Cleaner nutty flavor
If a recipe calls for salted butter, you can add salt after browning.
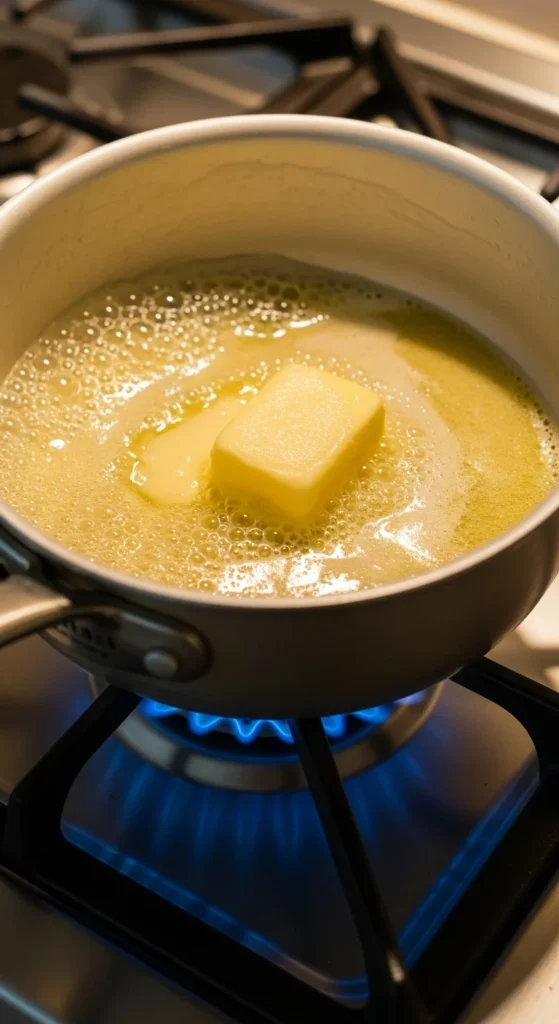
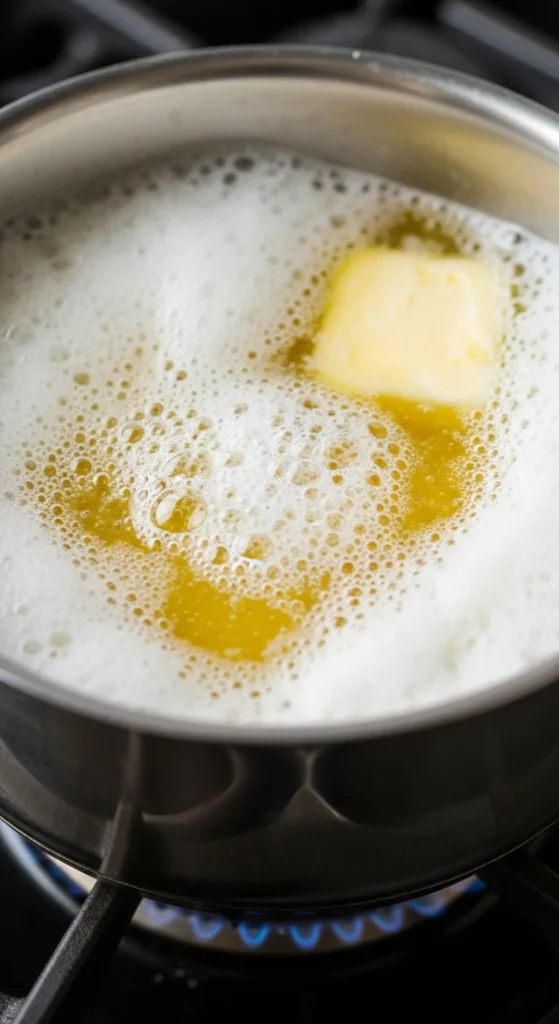
Melt And Cook The Butter Gently
This stage sets the foundation for even browning.
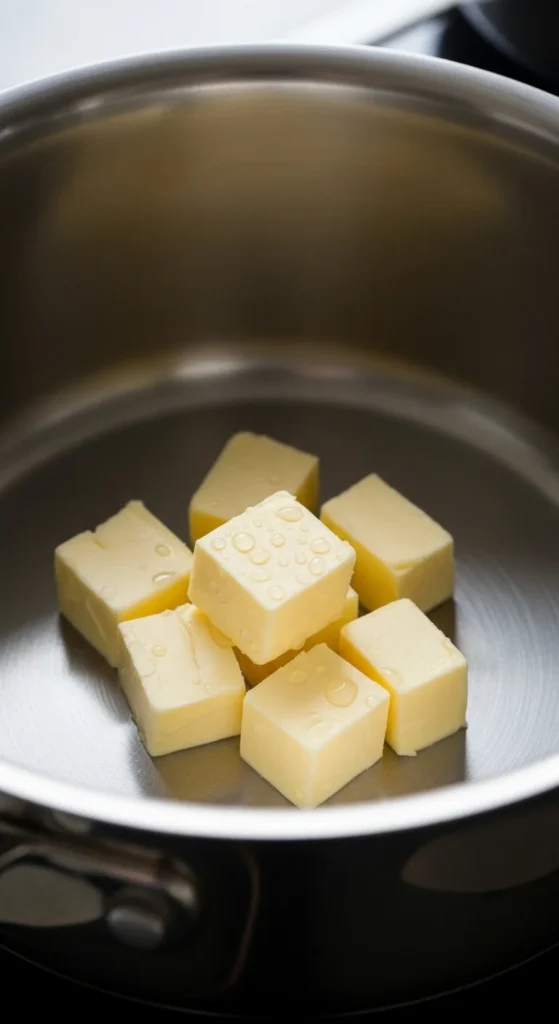
Cut Butter Into Even Pieces
Cutting butter into chunks helps it melt evenly and prevents scorching.
Do this:
- Cut the butter into 1-inch pieces
- Add all pieces to the pan before turning on heat
Use Medium Heat Only
Medium heat gives you control through each phase.
What you will see:
- Butter melts and separates
- Foam forms as water evaporates
- Bubbling becomes quieter as moisture cooks off
Do not rush this stage. High heat shortens the window between browned and burnt.
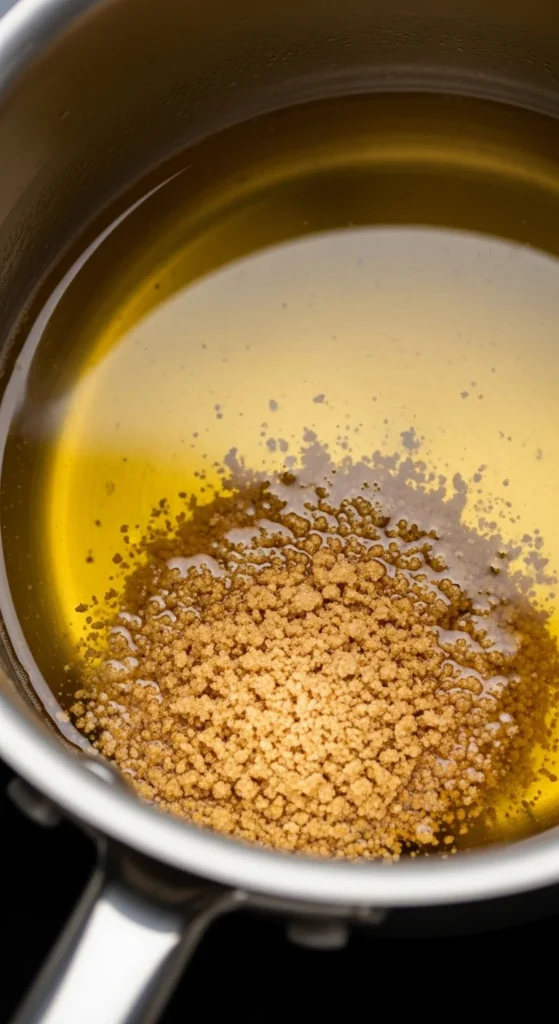
Watch Closely As Browning Begins
This is the most important part of the process.
Stir Or Swirl Constantly
As the foam subsides, milk solids sink to the bottom and begin to toast.
How to keep it even:
- Stir gently with a spatula or spoon
- Or swirl the pan continuously
This prevents hot spots and uneven browning.
Use Sensory Cues, Not Just Color
Brown butter is ready based on smell, sound, and appearance.
Look for:
- Golden brown specks forming at the bottom
- Clear butterfat above the solids
Smell for:
- Nutty, toasted aroma
- Notes similar to hazelnut or toffee
If it smells bitter or acrid, it has gone too far.
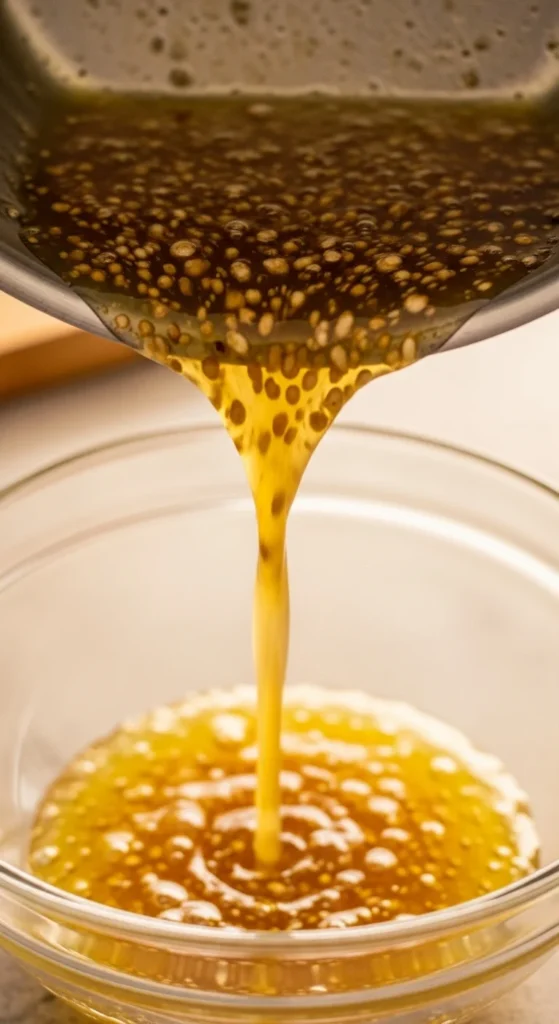
Stop The Cooking Immediately
Butter continues to cook even after the heat is off.
Transfer Right Away
As soon as the butter reaches the right color and aroma, remove it from the pan.
What to do:
- Pour the butter into a heatproof bowl
- Scrape in all the brown specks
Leaving it in the hot pan can burn the milk solids within seconds.
Keep The Brown Bits
Those brown flecks carry the deepest flavor.
Only strain if:
- A recipe specifically requires clear butter
- You accidentally overbrowned some solids
For most uses, keep everything.
How To Use Brown Butter
Brown butter works in far more dishes than people expect.
Sweet Uses
Brown butter adds warmth and depth to desserts.
Great pairings:
- Chocolate chip cookies
- Blondies and brownies
- Pound cakes and muffins
- Frostings and glazes
Let it cool slightly before mixing into batters.
Savory Uses
Its nutty profile also enhances savory foods.
Try it with:
- Fish or scallops
- Roasted vegetables
- Pasta sauces
- Mashed potatoes or risotto
A squeeze of lemon often balances the richness perfectly.
Storage And Make-Ahead Tips
Brown butter stores well and saves time later.
Short-Term Storage
- Refrigerate up to 1 month in an airtight container
- Solidifies when cold, softens at room temperature
Long-Term Storage
- Freeze in small portions
- Thaw gently before use
When reusing, warm slowly to avoid burning the milk solids.
Common Problems and How to Avoid Them
Following are some common problems that you must avoid:
Burnt Butter
Burnt butter turns dark brown or black and tastes bitter.
Usually caused by:
- High heat
- Walking away during browning
- Leaving butter in the hot pan too long
How to prevent:
- Stay at the stove
- Use medium heat
- Transfer immediately when ready
Once burned, butter cannot be saved.
Uneven Browning
Some solids burn while others stay pale.
Common reasons:
- Not stirring or swirling
- Hot spots in thin pans
Fix:
- Stir continuously
- Use a heavy-bottomed pan
Optional Variations and Flavor Boosts
Once you master the basic method, small additions can change the flavor direction.
Infused Brown Butter
Add aromatics after browning while the butter is still warm.
Popular options:
- Fresh sage leaves
- Vanilla bean
- Garlic clove for savory dishes
Let infuse briefly, then remove solids.
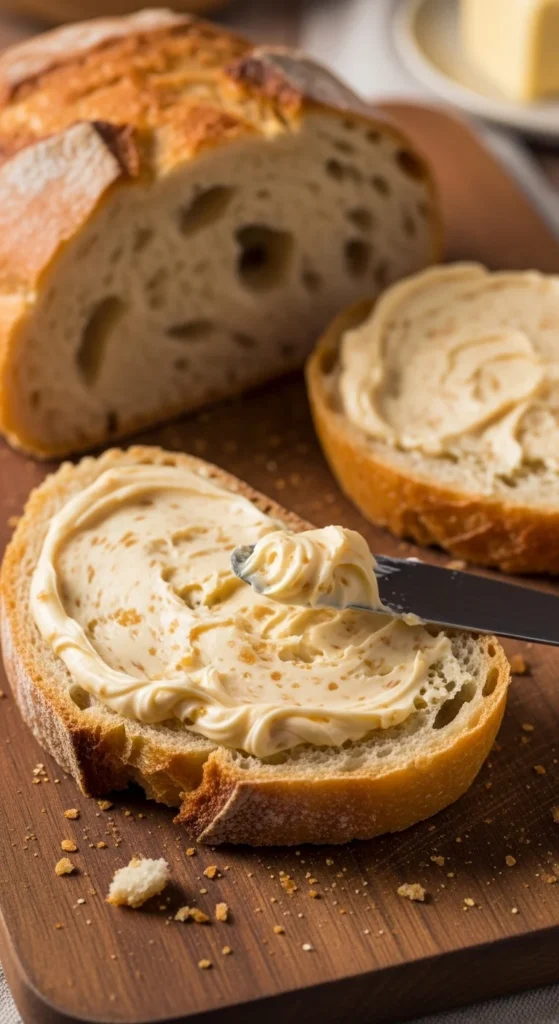
Whipped Brown Butter
Allow brown butter to cool until soft, then whip.
Best uses:
- Bread service
- Cornbread
- Steaks or roasted vegetables
This creates a spreadable, airy texture with intense flavor.
Final Thoughts
Brown butter is a small technique with a big payoff. Once you understand the stages and trust your senses, it becomes second nature. Keep the heat steady, stay attentive, and stop the cooking at the right moment. From there, the flavor does the rest.
Save this method and use it anywhere you want a deeper, richer taste without extra ingredients.

Leave a Reply