
Homemade broth is one of those foundational kitchen skills that quietly upgrades everything you cook. When done properly, it delivers depth, body, and richness that store-bought versions rarely match. The process is simple, but the details matter. This guide walks through each step clearly, so you know exactly what to do and why it works.
Start With The Right Ingredients
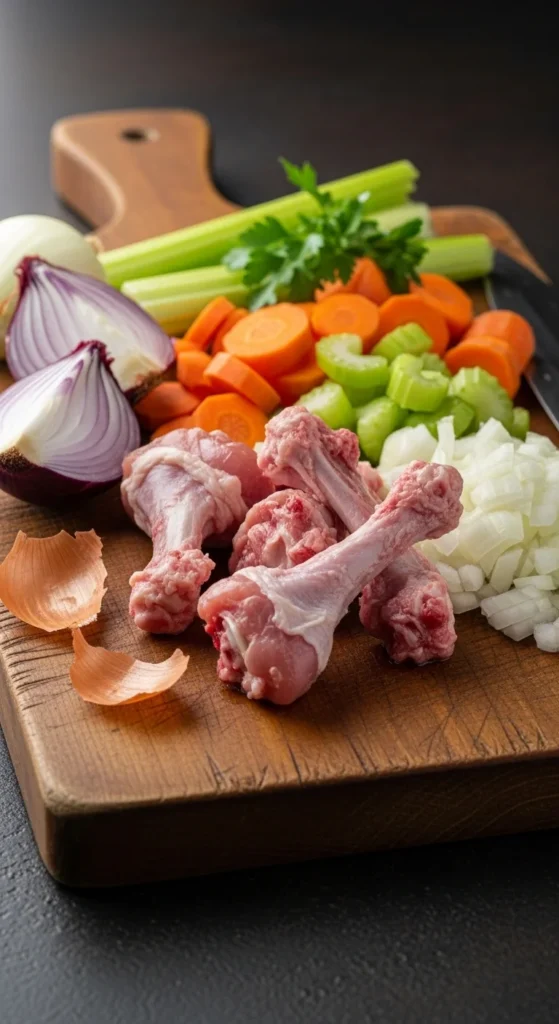
The quality of your broth depends entirely on what goes into the pot. Choosing the right components at the start saves you from weak or flat results later.
Bones Matter More Than Anything Else
Bones are the backbone of a rich broth. They provide flavor, body, and natural gelatin. Use bones with connective tissue and joints, such as chicken backs, wings, necks, beef knuckles, marrow bones, or leftover rotisserie chicken frames.
Avoid only using lean meat. Meat adds flavor, but bones are what give broth structure.
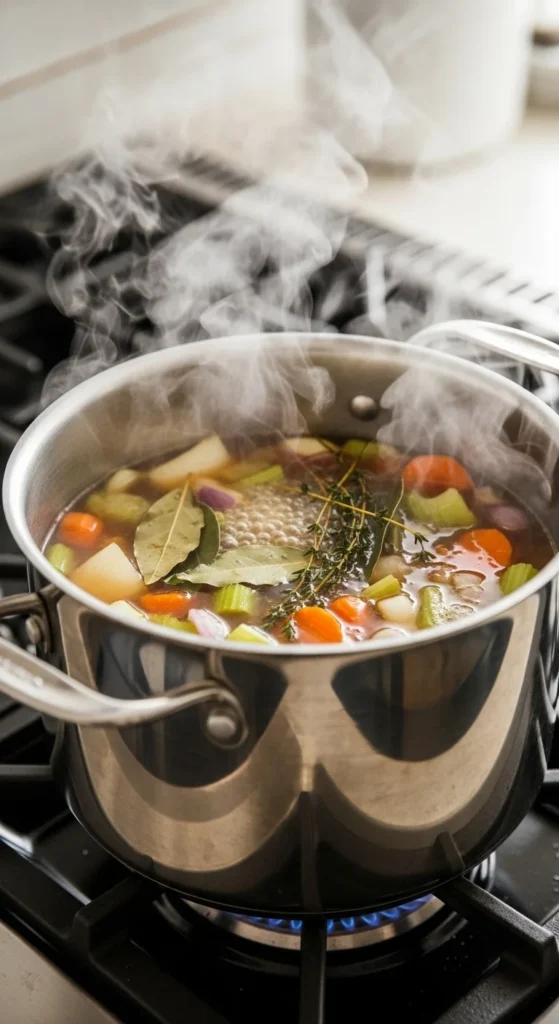
Vegetables Build The Base Flavor
A classic mirepoix creates balance and sweetness:
- Onions for depth
- Carrots for subtle sweetness
- Celery for savory backbone
Rough chopping is fine. Precision does not matter because everything will be strained later.
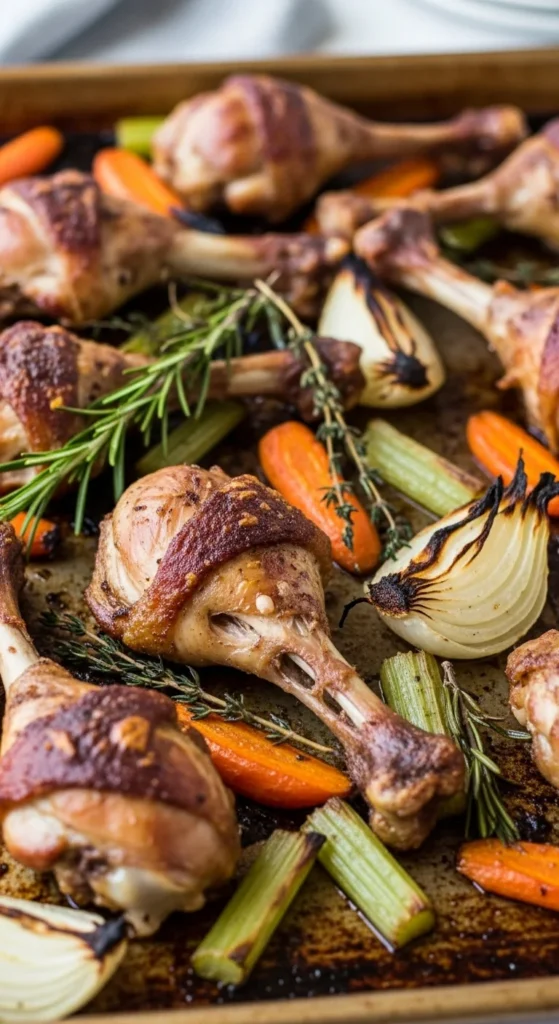
Roast Bones And Vegetables For Deeper Flavor
This step adds complexity and richness that simmering alone cannot achieve.
Why Roasting Changes Everything
Roasting develops caramelization that cannot be achieved through simmering alone. This step adds complexity and a darker, more robust broth.
How To Roast Properly
- Spread bones and vegetables in a single layer on a baking tray
- Roast at 425°F for 35 to 45 minutes
- Turn once halfway to ensure even browning
You are looking for deep golden brown, not blackened edges.
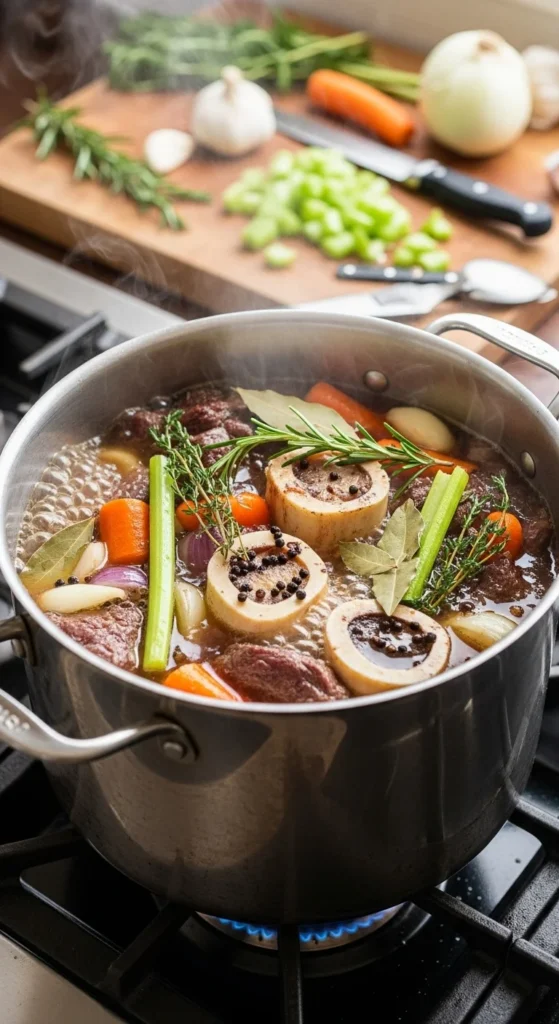
Build The Broth Slowly And Correctly
Once roasting is complete, the focus shifts to controlled extraction and balance.
Start With Cold Water
Transfer the roasted bones and vegetables to a large pot. Cover with cold water, leaving about two inches of space at the top. Cold water allows flavor and gelatin to extract gradually as the temperature rises.
Add Acid For Better Extraction
Add one to two tablespoons of apple cider vinegar. This does not make the broth taste sour. It helps draw minerals and collagen out of the bones during the long simmer.
Bring To A Gentle Simmer
Heat control is one of the most important factors in successful broth.
Never Let Broth Boil
Bring the pot slowly to a gentle simmer. Once small bubbles appear, lower the heat. A rolling boil will break fats into the liquid, making the broth cloudy and greasy.
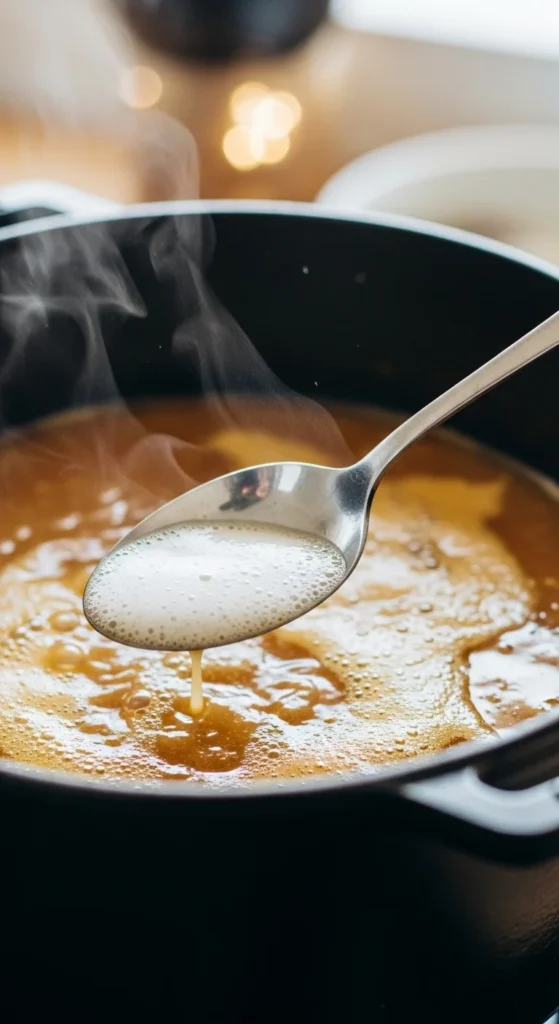
Skim Early And Often
During the first 30 to 45 minutes, foam and impurities will rise to the surface. Skim these off using a spoon. This step is essential for clarity and clean flavor.
Add Aromatics At The Right Time
Aromatics should support the broth, not overpower it.
Herbs And Spices That Work Best
Once the broth is gently simmering and skimmed, add:
- Bay leaves
- Thyme sprigs
- Whole black peppercorns
Tie herbs into a small bundle or sachet for easy removal later. Avoid adding salt at this stage. Reduction later can make the broth overly salty.
Simmer Low And Slow
Time is what transforms bones and vegetables into a rich, usable broth.
How Long To Simmer
- Chicken broth: 6 to 12 hours
- Beef or bone broth: 12 to 24 hours
Maintain a low simmer the entire time. The liquid should barely move.
What To Watch For
Check occasionally to ensure:
- The broth is not boiling
- The liquid level remains above the bones
- No burning at the bottom
Top up with hot water if needed.
Strain For Clarity And Clean Flavor
Straining correctly preserves the work you have already done.
Proper Straining Technique
Remove large solids with tongs first. Then strain the broth through a fine-mesh sieve. For ultra-clear broth, line the sieve with cheesecloth. Do not press solids aggressively. Pressing forces impurities back into the liquid.
Chill And Store Correctly
Cooling and storage affect both safety and final texture.
Cooling Safely
Cool broth quickly by placing the pot in an ice bath or dividing it into smaller containers. Once chilled, fat will rise and solidify on top. This can be removed or left as a protective layer.
Storage Guidelines
- Refrigerate up to 5 days
- Freeze up to 6 months
Freeze in measured portions such as 1-cup or 2-cup containers for easy cooking later.
Common Problems And How To Fix Them
Even when the process is followed carefully, broth can still go off in a few predictable ways. Use this section as a quick check when something does not look or taste right.
1. Cloudy Broth
Cloudy broth usually shows up when the cooking temperature is too high or the broth is disturbed too much.
What usually causes it
- Letting the broth boil instead of gently simmer
- Skipping early skimming when foam rises
- Stirring frequently or pressing solids during straining
How to handle it
- Keep the heat low so the surface barely moves
- Skim foam during the first hour
- Strain gently without squeezing solids
Cloudy broth is still safe and flavorful. The issue is visual, not quality.
2. Weak Flavor
A broth that tastes thin lacks concentration and depth rather than time.
Common reasons
- Too much water compared to bones
- Bones and vegetables not roasted deeply enough
- Ending the cook too early
How to improve it
- Simmer the strained broth uncovered to reduce and concentrate
- Add roasted bones next time for more intensity
- Use just enough water to cover ingredients
Flavor strengthens through balance, not volume.
3. Greasy Texture
Greasy broth feels heavy and leaves an oily coating in the mouth.
Why this happens
- Boiling breaks fat into the liquid
- Excess fat is left suspended in the broth
How to fix it
- Chill the broth completely
- Lift off the solid fat from the surface
- Leave a thin layer only if desired for storage
Removing excess fat restores a clean, rich mouthfeel.
Why This Works
Most broth problems come down to heat control, ratios, and restraint. Gentle cooking, minimal disturbance, and proper cooling solve nearly every issue.
Broth Vs Stock
Understanding the difference helps you use each one correctly.
- Broth uses meat and bones and is lighter
- Stock relies heavily on bones and becomes gelatinous when cold
Both are useful. For soups and sipping, broth works well. For sauces and braises, stock adds body.
Optional Shortcuts And Variations
These options adjust the method without changing the fundamentals.
Pressure Cooker Method
Using a pressure cooker can produce rich broth in about 30 to 45 minutes under high pressure. Natural release is essential for clarity.
Vegetable Broth Upgrade
Roast mushrooms, tomato paste, and onions for deep umami. Finish with a small spoon of miso after straining.
Final Thoughts
Great broth is built through patience and restraint. Gentle heat, proper ratios, and thoughtful preparation turn simple scraps into something deeply flavorful. Once you master this process, soups, sauces, grains, and braises all improve automatically.
Save this method, repeat it, and adjust flavors to match how you cook.

Leave a Reply