
Getting that airy crumb and strong oven spring is not luck. It comes from proofing dough at the right time, temperature, and condition. If you have ever dealt with bread not rising, dense texture, or flat loaves, proofing is usually the reason.
Once you learn how properly proofed dough looks and feels, your results become consistent. This guide walks you step by step so you can proof dough with confidence.
What Proofing Really Does
Proofing is the stage where yeast ferments and produces gas inside the dough. That gas stretches the gluten network and creates volume. At the same time, fermentation develops flavor and improves texture.
Proper proofing gives:
- Lighter crumb
- Better flavor
- Strong oven spring
Underproofed dough turns dense. Overproofed dough collapses. Balanced proofing gives structure and softness.
Bulk Fermentation and Final Proof
Both rises matter because each one plays a different role.
Bulk Fermentation
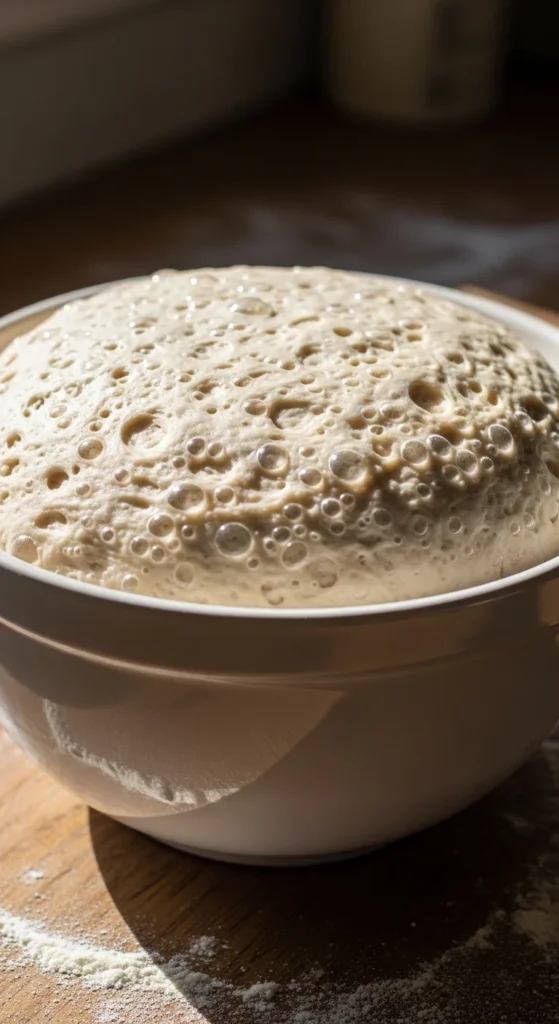
This is the first rise after kneading. It builds strength and flavor in the dough. During this stage, dough should look slightly domed, bubbly, and alive.
Typical range:
- 1 to 4 hours at about 75 to 82°F
- Longer for sourdough
Final Proof
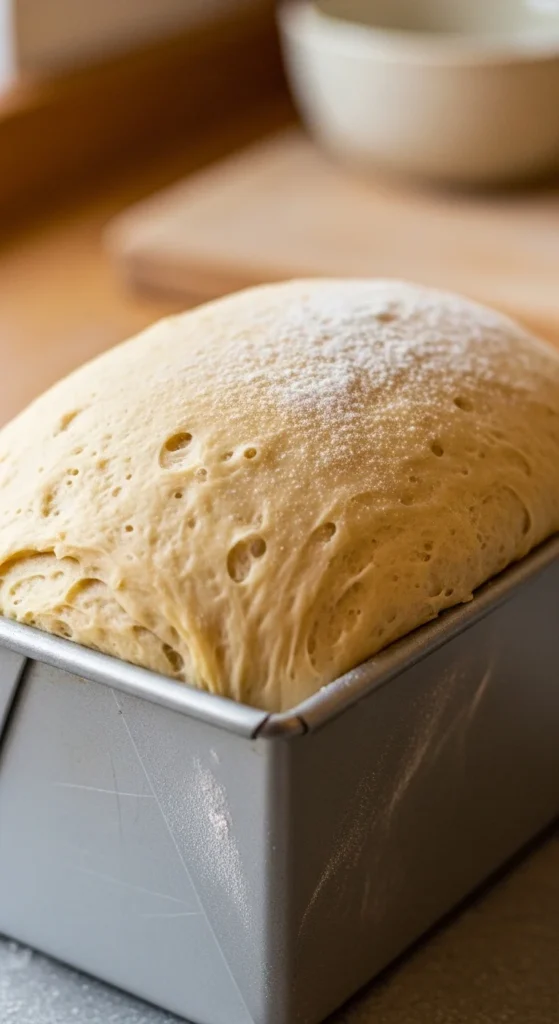
This happens after shaping. Now the dough inflates into its final baking form. This stage decides the final height and crumb.
For loaf pans:
- Fill the pan about halfway
- Proof until dough rises roughly 1 inch above the rim
This helps answer how much dough for a loaf pan and prevents overflow or dense centers.
Master the Poke Test
This is the most reliable way to judge yeast dough rising time. Lightly flour your finger and press about half an inch into the dough. Then watch how it reacts.
- Quick bounce back means underproofed
- Slow, partial spring back means ready
- No spring back means overproofed
The poke test is far more accurate than guessing or waiting for dough to double.
Ideal Temperature for Proofing
Temperature strongly affects yeast activity. The sweet spot:
- 75 to 85°F for most dough
- 75 to 78°F for sourdough
Heat above 110°F can weaken or kill yeast.
Reliable warm places at home include:
- Oven with the light on
- Microwave with a cup of hot water inside
- Top of the refrigerator
- A warm, draft free corner
Raising bread dough in the oven with just the light on is one of the most consistent home methods.
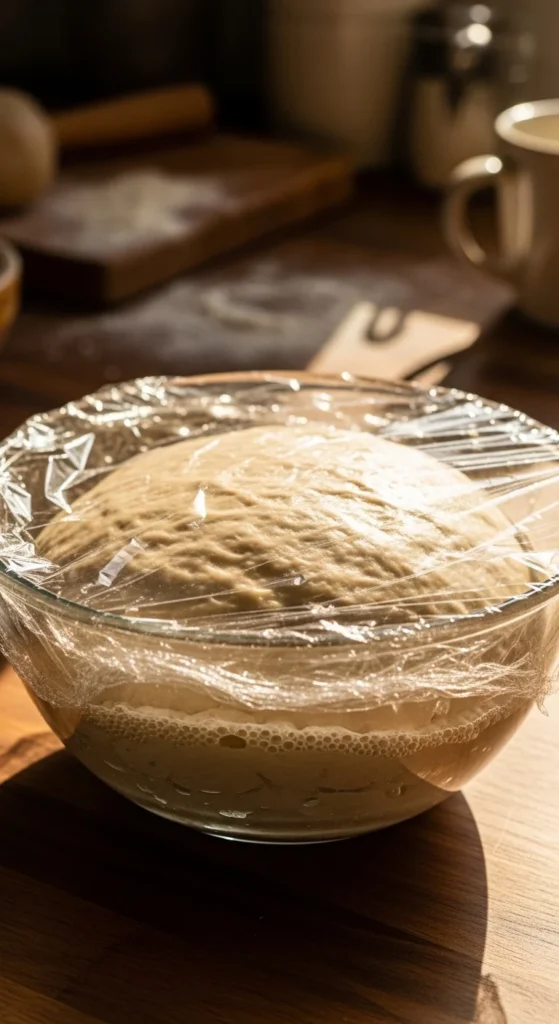
Why Humidity Matters
Dry air creates a skin on dough. That skin limits expansion and can tear during baking. Keep dough protected by covering it well.
Plastic wrap works best because it traps moisture. A damp towel also helps if it stays moist.
This is especially important in dry climates or air conditioned kitchens.
Cold Proofing for Flavor
Cold proofing, also called long rise bread fermentation, improves both taste and structure.
Typical cold proof:
- 10 to 16 hours in the fridge
- Up to 48 hours maximum
Cold proofing:
- Develops deeper flavor
- Strengthens gluten
- Helps scoring
- Improves oven spring
How long does sourdough bread rise in the fridge often depends on starter strength, but overnight is common.

How Long Dough Can Sit Out
Many people ask how long can bread dough sit out.
At room temperature:
- Bulk rise usually lasts 1 to 4 hours
- Final proof often 30 to 90 minutes
After too long, the dough can become overproof.
Warning signs:
- Strong alcohol smell
- Very loose texture
- No response in poke test
Fixing Underproofed or Overproofed Dough
Underproofed dough often bakes densely. If the poke test springs back fast, give it more time and slightly warmer conditions.
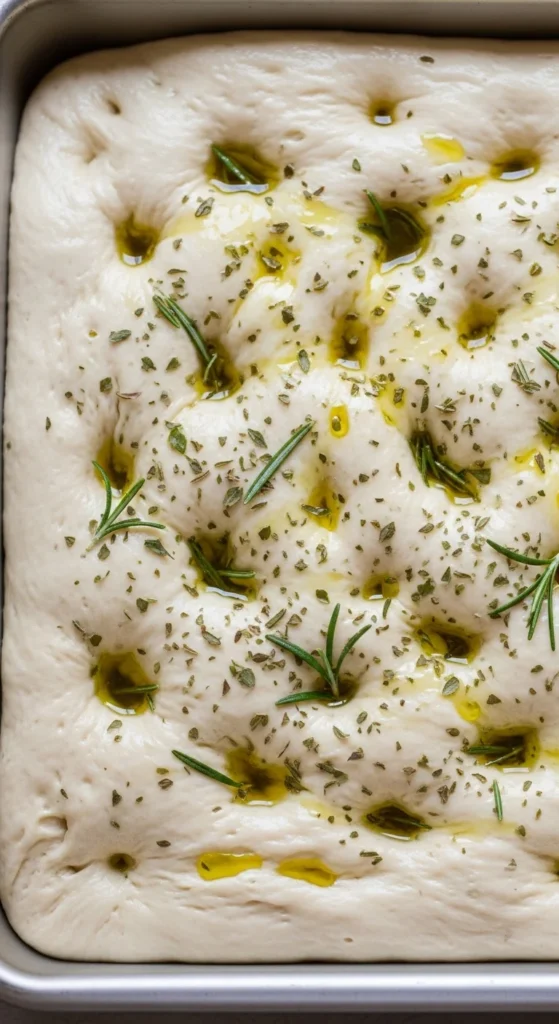
Over proofed dough feels weak and collapses easily. It is still usable.
A smart rescue is focaccia. Press the dough into an oiled pan, dimple it, add olive oil and herbs, then bake. The flat shape works in your favor.
Do Not Rely Only on Size
“Doubled in size” is not always reliable.
High hydration dough and whole grain dough behave differently. Some will not visibly double.
Better cues:
- Dough jiggles when moved
- Surface shows bubbles
- Dough feels airy and light
Touch and feel give better information than volume alone.
Best Place to Let Bread Rise
The best place to let bread rise is warm and stable.
The oven with the light on works very well because it traps gentle heat and humidity. A microwave with hot water inside is another good option.
A busy countertop with drafts and temperature changes is less reliable.
Useful Tools
Good tools make handling easier, but they are not required for good proofing.
A banneton basket supports shaped dough and helps maintain structure. It also creates a nice pattern on artisan loaves.
A dough scraper helps move sticky dough without tearing gluten.
A proofing box offers precise control for frequent bakers, but careful home methods can still give great results.
Final Thoughts
Bakery level bread comes from reading the dough, not racing the clock. When you learn to judge dough by feel, your results improve quickly.
Trust the poke test. Control warmth and moisture. Give yeast the time it needs.
Once you understand proofing, you will rarely struggle with bread not rising again. And that is when home baking starts to feel like a bakery.

Leave a Reply